Making My Mini Bathroom Shine
When I first moved into my little walk-up apartment, I fell in love with it right away. The location was perfect – right in the midst of my favorite cafes, bookstores, and boutiques. Rent fit my budget. Plus it had tons of charm, like the exposed brick walls and bay windows in the living room. I’d scored my dream place!
Well…almost.
There was one big catch. More like a tiny catch: the sole tiny bathroom. We’re talking minuscule. The floorspace barely squeezed in a short twenties-style clawfoot tub, a toilet, and pedestal sink. All that left zero room for a shower!
It wasn’t an ideal scenario for getting clean, but this apartment was meant to be mine. I was determined to carve out some sort of suitable shower space. Problem was, I wanted it to be stylish too. Those charming old details like subway tiles and hex floors wouldn’t work with a big modern glass box crammed inside!
So began my quest to create a small but sublime shower enclosure that would function beautifully while matching my little walk-up’s charm. I knew with some Pinterest browsing, trips to the hardware store, and a good contractor I could make it happen. I dove into maximizing every possible inch to design my petite but perfect bathroom.
From struggling with uncooperative room shapes and angles to getting inventive on space for my shower products, it was a learning process. But I picked up plenty of great tips – like rethinking traditional enclosure layouts and incorporating slimline fixtures – to make the most of tiny baths along the way. Read on for those helpful hints as well as the story of how I turned 50 square feet into my gorgeous glam bathroom!
Squeezing In the Shower
I encountered plenty of tricky tight space issues while designing my petite shower. First was the obvious lack of floorspace. I only had a three foot wide by four foot deep corner to work with. That’s less than some public elevator cars! It meant a typical 36″ square shower stall was out. I’d have to think creatively about the layout.
The room also had odd sloped ceilings and walls thanks to retrofitting the apartments into old warehouses. One side was nearly flat while the ceiling dropped dramatically to just over six feet high on the other. So much for standing comfortably to wash my hair on that side!
On top of layout and ceiling height challenges, I struggled to coordinate the new shower amongst existing bathroom features. The doorway, window placement, and plumbing fixtures further limited where I could reasonably place it. Basically, I ended up with one tight corner that sorta-kinda worked. Better make it count!
Finally, living in an apartment meant I had no basement or other square footage to store backup towels, toiletries, etc elsewhere. Yet I certainly didn’t want shampoo bottles cluttering up my dream spa retreat! I had to incorporate creative storage solutions into the design too.
Between the size constraints, odd dimensions, nearby fixtures, and need to stash stuff, making this shower happen felt like playing spatial Tetris. I definitely couldn’t just stick a basic glass box in the corner and call it done. This required some creative problem solving and compromise to construct my petite palace! With some ingenuity though, I was determined to make it work beautifully.
Planning My Dream Shower
Before I started installing anything, I put together a rough layout for my tiny shower space. Carefully considering a few key elements made all the difference in creating a functional and gorgeous design.
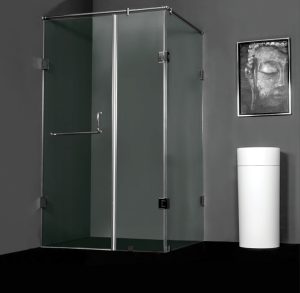
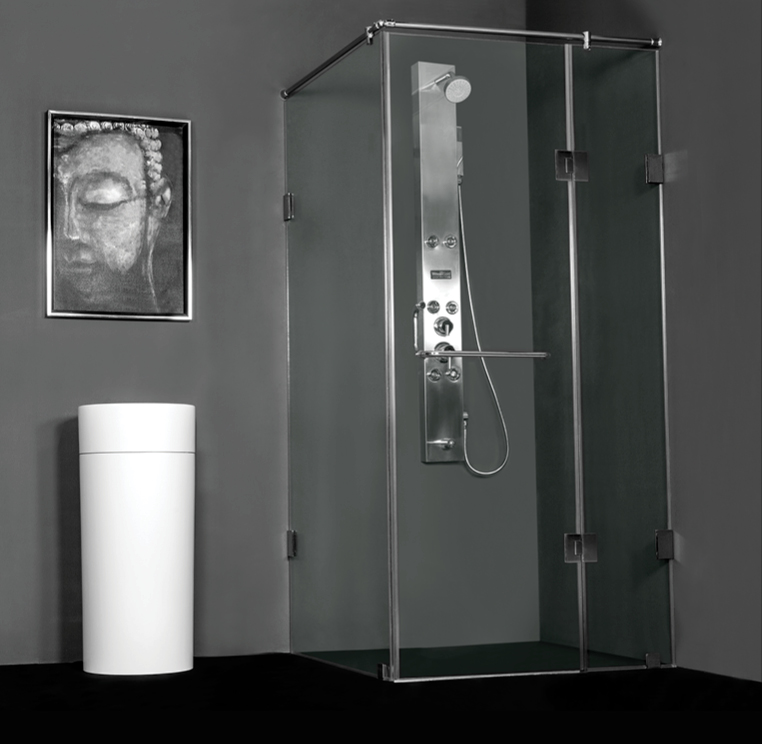
First up was selecting the right enclosure shape and orientation to work with the challenging room dimensions. I decided a neo-angle fit best. This style utilizes two walls for an open-corner configuration. The semi-enclosed shape felt less claustrophobic than a cramped upright stall given the tight quarters. Orienting the door on the wider wall also kept things spacious.
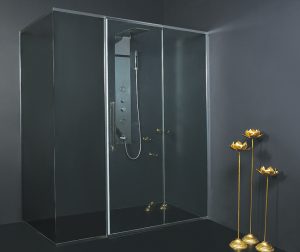
Another big decision was rethinking the traditional shower floor and wall tile layout. Typical grids of small square tiles would overwhelm the petite bath. Instead, I planned skinny planks run vertically to draw the eye up and make the space appear taller. Going floor-to-ceiling also maximized the visible white tile to open up the room.
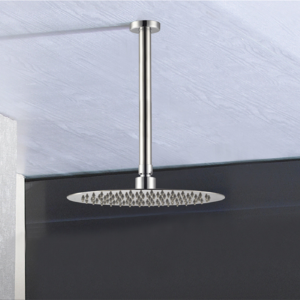
For fixtures, I searched high and low for narrow, low-profile equipment. A barely-there razor thin shower pan let me squeeze in a functional floorspace. Plus, I discovered an ultra-slim rainfall showerhead model. Mounted flush to the ceiling, it maintained gracious heights for using my compact creation.
Finally, glass was a game changer for an airy aesthetic over shower curtains. Besides the modern style I wanted, frameless glass partitions took up almost no space themselves. The transparent doors completed the illusion making my 3’x4′ corner appear nearly double in size!
Carefully weighing these elements – enclosure shape, tile orientation, discreet fixtures, and glass dividers – mattered most when designing for my tiny square footage. They allowed the final product to not only fit, but also feel much roomier than the cartoon-like dimensions suggested. With the plans mapped out, I set out to make my cunning compact shower concept a reality!
Making Magic With Mini Bathrooms
I discovered and implemented many clever little tricks to create the illusion of space when constructing my slim shower. Small bathrooms may present big design challenges, but thinking innovatively opens up possibilities.
One of my favorite tips was incorporating floating corner shelves rather than drilling into the tile. I attached three slim teak planks to hold daily essentials like shampoo. The airy, floating aesthetic kept walls visually clean and weightless to counter the cramped quarters. Bonus – the rich wood adds organic spa style even in my metro apartment!
Additionally, I worked with my contractor to embed a pair of narrow recesses in the wall. These hold razors, brushes, and other necessities nearly invisibly! Not needing to hang shower caddies freed up the surrounding glass walls and made the space feel simplified. The only drilling happened behind the scenes.
When it came time to select enclosure panels, frameless glass was the clear choice…literally! Fritted patterns block views while maintaining an open, airy vibe. The transparent dividing walls practically vanish, hugely expanding the feel. No bulky metal brackets or shower rod disrupted proportions here.
Finally, extending the showerhead directly from the ceiling helped overcome the room’s dramatically sloped shape. I can enjoy relaxing under the intense rainfall flow thanks to the 8’ high mount – no ducking required! This clean, modern look also kept the visual lines simple and lightweight to prevent an overly busy aesthetic in the petite bath.
Between crafty built-ins, barely-there glass partitions, and clever fixtures, I unpacked every trick to make this tiny shower feel triple its actual size. Hopefully these ideas help you create the illusion of space when maximizing your own small bathrooms!